


As a plugin, put SUPERNOVA on your master bus — the audio is bit-exact pass-through, so it sees the whole mix without changing a sample of it.
What SUPERNOVA is
SUPERNOVA is an audio-reactive visual synthesizer — a VJ instrument for macOS. You drag in an image or a video and a GPU engine samples it with 262,144 particles (a 512×512 grid) that move, glow and burst with your sound — it breathes on the pads, electrifies on the hats, explodes on the kick and re-forms. It runs both as a VST3 / AU plugin inside your DAW and as a standalone macOS app, and the audio it reads is a bit-exact pass-through — a read-only tap that never colours your sound.
Where it shines It shines on live streams and VJ sets, on music videos and cover art, on a second monitor at a party, or just as a beautiful listening companion. Feed it your own photos, a logo or a loop — anything with an image becomes a living, sound-driven visual you can play, record and route into your show. For the standalone app and its driver-free system-audio capture, see the companion App manual.
Up and running in five steps
As a plugin: drop SUPERNOVA on any track or bus — its audio is bit-exact pass-through, so it's even safe on the master. As the app: just open it (see the App manual for audio setup).

SOURCE picks where the sound comes from, and the meter beside it shows it arriving. Drag an image, a folder of images (a photo sequence), or a video onto the window. The particles take its shape and colour.

LOAD takes an image, a folder of images (a photo sequence) or a video — you can also just drop the file on the window. ▦ hides or shows the MEDIA strip; the AUTO 1:1 chip is the canvas format — AUTO follows your first item (here a square logo → 1:1). Open the Worlds browser and pick one of the 50 presets — each one swaps the physics, geometry and colour at once.

The world browser: ◀ name ▶ walks the 50 factory worlds one at a time, and ⊞ opens the grid to pick by eye. Raise INTENSITY until the field feels alive with the music. It's the master "life" fader — the one knob that drives everything.

INTENSITY is the master “life” fader — the one knob that takes the whole field from a calm shimmer to a full storm. Send the picture where you need it: a window, fullscreen on any display, into OBS / Resolume / VDMX via Syphon, or record a clip straight to MP4 with sound.

Where the picture goes: fullscreen on any display, SYPHON into OBS / Resolume / VDMX, TOP to keep the window above everything, and MIC/MIDI for the MIDI layer.
How the signal moves through it
SUPERNOVA taps your audio read-only and runs a lightweight analysis every block — onsets (the kick), frequency bands and overall RMS. That analysis advects 262,144 particles (a 512×512 grid) on the GPU: each world defines a force field (flow, vortices, gravity, radial blast) that pushes the particles, which sample the colour of your image or video. The field is composited in linear additive HDR and resolved through an ACES filmic tonemap, so highlights bloom and roll off like film instead of clipping to a flat white. The final frame goes to the on-screen view, any fullscreen display, and — if enabled — a Syphon server for OBS / Resolume / VDMX; it can also be recorded to an MP4 with an in-sync audio track. The audio itself passes straight through, sample for sample: out equals in.
This is the picture pipeline, not an audio one: the sound only enters as a read-only tap and leaves untouched — out equals in, sample for sample, at 0 samples of latency.
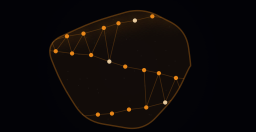
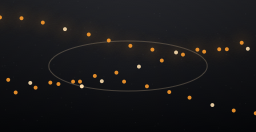
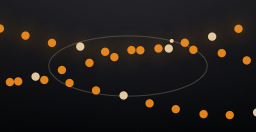
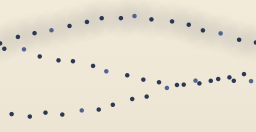
Fifty ways to see it.
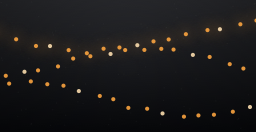
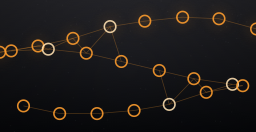
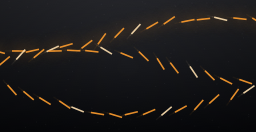
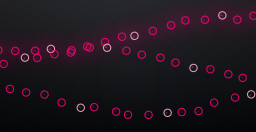
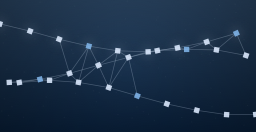
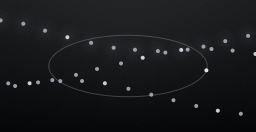
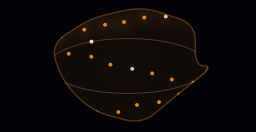
A world is a preset for the whole system at once — its own physics, its own geometry and its own colour ramp. One click and everything changes. Twelve of the fifty here; the full set is on the SUPERNOVA page.

Every control, explained
Media, worlds & the master fader

Source (Load)
What the particles are made of.
Drag a single image, a folder of images (a timed photo sequence), or a video file onto the window. The particles sample its colour; a video plays and re-samples live.
High-contrast subjects on a plain background cut out best (see Cutout). A slow video loop makes an endless evolving backdrop.
Worlds (Preset)
The 50 curated worlds — the factory presets.
Each world is a whole scene: it swaps the physics (how particles move), the geometry and the colour look in one click. Browse the grid and step next / previous.
Treat a world as a starting point — pick the closest one, then push INTENSITY and the four domains until it's yours. Five of them — Satellite, Parallax, Lantern, Meridian and Vantage — share one idea: your picture stays your picture. They add depth, parallax, a slow orbit, a cut-out or a light, but they never mirror it or break it apart. Reach for those when the image itself is the point.
INTENSITY
The master "life" of the whole field.
0–100 %. Scales how hard the entire system reacts to the audio — from a calm shimmer to a full storm. The single most important knob.
Automate it (or MIDI-learn it to a fader / mod wheel) to make the visual build and drop with the track.
The MEDIA session — cue, reorder, relink

The MEDIA strip
Your whole session, in order, under the picture.
As soon as media is loaded a strip of numbered thumbnails appears between the visual and the knobs — every photo and video of the session, the current one outlined with a small bar counting down to the next change. Click a tile to cue it (← / → step through it, and the number keys 1–9 / 0 jump straight to one), drag to reorder, ✕ to remove. Dropping files or a folder onto the strip inserts them where you drop them; ▦ in the top bar hides it.
Removing, reordering, rotating and clearing are all undoable with Cmd + Z — and the session is saved with the project and with your user presets, so reopening brings it back.
Canvas FORMAT · FIT / FILL
The shape of the canvas, like a project format.
AUTO follows your first item — a vertical photo gives 9:16, a square 1:1, a landscape 16:9 — or pick FREE / 16:9 / 9:16 / 1:1 / 4:5 / 4:3. The same menu chooses FIT (the whole image, letterboxed) or FILL (cropped to fill). The editor, fullscreen output, the Syphon feed and the EXPORT default all follow it.
Shooting for Reels? Set 9:16 first — EXPORT then lists Vertical at the top, marked canvas.
SEQ — clock, order & transition
How the sequence moves on.
Seconds (the classic slideshow), Beats — 1 · 2 · 4 · 8 · 16 · 32 · 64, changes landing on the bar — or Kick: a new photo on every kick the analysis hears, never faster than a minimum gap (0.25–8 s). Order is Loop or Shuffle; the transition is Dissolve or Burst. Dissolve is always on and has nothing to set: every photo melts into the next, however the change is fired — the clock, a click, a number key, an arrow, a MIDI note or dropping a photo on top of another one — and the exported clip dissolves the same way. Its length comes from the clock itself (45 % of the interval, capped at 0.7 s and never under 0.1 s), so at the usual pace it takes about 0.7 s and on Kick with the minimum 0.25 s gap it closes in 0.11 s, before the next kick. Burst explodes the old photo first, and what blows apart re-forms already wearing the new one's colours. Two things still cut, on purpose: CLEAR, and opening a session onto an empty canvas — there is no picture to melt out of.
In Beats a cue waits for the next bar — the armed tile shows a dashed outline — so the change lands on the beat. Hold Shift to fire it right now.
Missing media & Relink
A file that moved is marked, not dropped.
If a photo or video isn't where it was, its tile stays in the session marked missing: a red ! instead of the thumbnail, the name greyed out. Nothing cuts to it — the sequence, ← / →, the number keys and the MIDI cues all step over it. Right-click for Relink… (that one file) or Relink folder…, which finds every missing item that used to live beside it in one go.
If the file simply comes back to where it was, the tile heals itself the next time the session refreshes.
Movement — how the field moves

MOVEMENT domain
How the particles move — the first of the four domains.
Motion picks the flow field (Contours · Matter · Wave · Vortices · Radial); Chaos, Curl Scale, Home Pull, Gravity and Momentum shape the forces; Speed time-warps the whole simulation (50 % = ×1).
Vortices + a little Chaos gives a galactic swirl; Radial + Home Pull snaps the image back together between hits.
Blast
The kick response — a radial shove on every onset.
0–100 %. When an onset is detected the particles are pushed outward, then the field re-forms. This is the "explode on the kick" behaviour.
Pair a high Blast with Home Pull so it detonates and re-gathers cleanly on every beat.
Breathe & Pump
Slow RMS breathing and a visual sidechain.
Breathe swells the whole field with the loudness envelope; Pump ducks it on transients like a sidechained compressor (≈30 % is the classic feel).
A touch of Pump locked to the kick gives that pumping, club-visual throb without any MIDI.
Matter — what the particles are

MATTER domain
What each particle looks like — the second domain.
Size and Glow set the grain and bloom; Density draws more or fewer of the 262k; Scatter morphs from a crisp image to a loose cloud; Shimmer adds sparkle.
Low Density with big Size reads as chunky embers; high Density with small Size reads as fine dust.
Shape (Glyphs)
The sprite each particle is drawn with.
Choose from Dot · Disc · Ring · Dash · Tri · Quad · Spark — SDF glyphs rendered crisp at any size.
Dash + Trails gives calligraphic streaks; Ring reads as bokeh; Spark reads as fireworks.
Trails
Velocity streaks behind each particle.
0–100 %. Feeds a fraction of the previous frame back, so fast particles smear into light-paths.
High Trails with low Density turns motion into flowing ribbons of light.
Links (Plexus)
GPU nearest-neighbour connections.
0–100 %. Draws lines between particles that are close together — a live constellation / network mesh that reacts as the field moves.
Keep it subtle on dense fields; on a sparse field it becomes a clear plexus web.
Cutout (3D)
Isolate the subject from its background — as a live knob.
0–100 %. Uses Vision saliency + subject cutout to blend between the full image and a mask of the subject only, so the background falls away and the subject floats — a 3D cutout you can rotate in particle-space.
Best on a photo with a clean, flat background; combine with Depth to sculpt and spin the subject in space.
Camera — where you watch from

CAMERA domain (3D)
The viewpoint on the field — the third domain.
Depth lifts the field into real 3D volume (order-independent additive, no z-sort); Rot X / Rot Y tilt it; Rotate and Orbit spin the view automatically; Kaleido mirrors it into 2/4/6/8 segments.
A slow Orbit with some Depth gives a hands-off, always-moving 3D sculpture — perfect for a stream.
Figure & Form
Morph the image into a geometric body.
Figure picks a target shape — Image · Sphere · Spiral · Rings · Grid · Helix — and Form fades from the flat image (0 %) to that 3D geometry (100 %).
Ride Form up on a drop so the picture collapses into a spinning sphere or helix, then back.
Colour — the look

COLOR domain — Color Lab
The look ramp (Palette) and how it's applied — the fourth domain.
Palette selects one of 17 curated looks baked in OKLab (Thermal, Magma, Vaporwave, Black Gold…); Color Amount mixes the gradient-map in; Background sets the look's paper.
Palette 0 (Original) keeps your image's own colours; the curated ramps re-grade the whole scene by luminance.
Saturation / Hue / Hue Cycle
Global colour trims.
Saturation 0–100 % (50 = neutral); Hue rotates the whole palette; Hue Cycle drifts the hue slowly over time.
A gentle Hue Cycle keeps a long stream visually evolving without touching anything.
Variation
Curated, seeded randomisation.
A master Variation plus per-domain Movement / Matter / Camera / Color Var nudge a world into a fresh but still-musical variant — deterministic from the preset's seed.
Turn Variation up a touch to make a familiar world feel new, without going off the rails.
LFOs — four modulators, recalculated every frame

LFO card — ON · TARGET · RATE · SHAPE · DEPTH
One card per LFO, four in all. Open the panel with the LFO button.
ON enables the slot and the target starts moving. TARGET picks one of 12 parameters — hue, saturation, intensity, size, glow, chaos, rotate, orbit, scatter, trails, links, depth. RATE under SYNC offers every division from a sixteenth to four bars, each with its triplet (·T) and dotted (·D) — 21 in all; under FREE it becomes Hz (0.05–20) and runs off the clock instead of the tempo, so it keeps moving with the transport stopped or with no host. SHAPE is a strip of 6 icons that draw their own curve: Sine, Triangle, Saw, Square, Ramp Down and Sample & Hold.
At 100 % DEPTH an LFO sweeps exactly the target's range and is clamped to it — several LFOs on the same parameter can no longer push it out of bounds.
BI / UNI · PHASE · RETRIG
The second line of the card: how it swings.
BI swings both ways around where you left the knob; UNI only adds, from the knob upward. PHASE offsets where the cycle starts, 0–360° — set two LFOs apart and they chase each other instead of pulsing together. RETRIG restarts the cycle now, on the current beat, without moving your PHASE setting. All three are saved with the project.
RETRIG is how you line an LFO up with a drop by hand — and the starting point when there is no host transport to lock to.
Live output meter
What each modulator is doing, right now.
Every card carries a meter that pulses with the LFO's value in real time. Synced LFOs follow the BeatClock — the host tempo inside a DAW, the TAP button in the app — and either way the modulation is recalculated on every rendered frame, at your display's refresh rate.
That per-frame recalculation is why a fast LFO reads as a wave and not a staircase. Watch the meter to time a peak to the drop.
Scenes, MIDI & output

Scenes & User Presets
Save, recall and undo your own looks.
Store the full state as a user preset (save / recall) and switch between scenes on the fly. Every move is undoable — full Undo / Redo — so you can push a world hard and step back.
Build a few scenes for a set and jump between them live; nudge Variation inside a scene to keep it fresh without losing the look.
MIDI (Learn · CC · Triggers)
Play and automate the visuals from a controller.
Right-click any knob to MIDI-learn it, then drive it from a CC. Incoming notes fire events — a note detonates the field (Explode) or launches a directional ray whose angle follows the pitch. Works in the plugin (needs MIDI input) and the app. Notes 72–87 cue tiles 1–16 of the media session, 88 / 89 step next / previous and 90 jumps to a random photo (never the one on screen) — so the session stays playable in immersive or fullscreen, where the strip isn't visible. Cues follow the sequence clock; MIDI cue: now in the SEQ menu makes every note cut immediately.
Learn INTENSITY to a fader and map a pad to Explode — you VJ the whole field by hand, perfectly in time.
Output & Syphon
Where the picture goes.
The on-screen view, plus fullscreen on any connected display, plus a Syphon server that hands the live frame to OBS, Resolume or VDMX with no capture card. macOS only.
Syphon is zero-copy on the GPU — cleaner and lighter than screen-capturing the window.
Export (MP4)
Record the visuals to a video file.
Renders an MP4 / H.264 clip with four aspect / format presets, muxed with sound — a 30 s real-time audio ring buffer is written to an in-sync AAC track. Choose any duration from 1 to 600 s — but the clip is driven by that same 30 s window, so anything longer repeats it, picture and sound together — and the repeat is crossfaded over 10 ms, so the loop point no longer ticks. The clip plays back the window: the same physics (measured in seconds, not in frames of your display), the same exposure at 4K as at 1080p, your photo decoded the way the window decodes it, and the photo changes dissolving as they do on screen. It starts already in motion and keeps the tilt and colour drift ORBIT and HUE CYC have accumulated. What does not travel: the knob values are frozen the moment you press EXPORT, so an LFO or a preset morph in flight is not baked in. macOS only (AVFoundation).
Set a custom duration and hit export at the drop — you get the picture and the audio locked together, ready to post. Park the knobs where you want them first: what is on screen when you press EXPORT is what the clip renders.
Clear
Reset the field.
Wipes the particles and trail buffer back to the current image's rest state — a clean slate without reloading.
Hit Clear after a heavy Trails/Blast passage to instantly settle the picture.
Tips & tricks
01
02
Load a photo sequence (a numbered folder) to tell a story: the images advance on a timer while the particles keep reacting.
03
For a hands-off stream, set a slow Orbit + Hue Cycle (or park an LFO on Hue) and leave it — the scene keeps evolving on its own.
04
Big Blast + strong Home Pull is the money move: it explodes on the kick and snaps the image back together in the gaps.
05
Use Cutout on a portrait with a plain backdrop, then push Depth and a slow rotation — the subject lifts off the background into 3D particle-space.
06
Building a set? Save a few scenes, MIDI-learn INTENSITY and a pad to Explode, and jump between looks live — every move is undoable.
07
Caught a great take? Export an MP4 with sound at a custom length — the 30 s audio buffer keeps the clip perfectly in sync for socials, and a 30–45 s piece no longer brings the same bar back.
Troubleshooting
It's not reacting to the audio.
As a plugin, make sure signal is actually passing through SUPERNOVA (it's an insert on a playing track) and INTENSITY is up. As the app, you need to select an input and grant permission — see the App manual for system-audio capture and its one-time macOS permission — System Audio Recording on macOS 14.2+, the older Screen Recording switch on 13–14.1. Either way it is how macOS gates system audio; it is not the microphone.
Everything blows out to flat white.
Pull INTENSITY, Glow or Blast down. SUPERNOVA composites in HDR with an ACES tonemap, but very high settings still push the core past the roll-off. Lower Glow first for the biggest change.
The subject won't separate from its background.
Cutout works from a subject mask (Vision saliency), which needs a reasonably flat, contrasting background. On busy photos the mask is weak — lower Cutout and lean on Scatter and Depth for separation instead.
My kick isn't triggering the explosion.
Raise Blast and make sure the onset is landing — a very compressed or quiet source gives weak onsets. You can also MIDI-learn a pad to Explode and fire it by hand, perfectly in time.
Syphon isn't showing up in OBS / Resolume.
Enable the Syphon output in SUPERNOVA, then add a Syphon Client source in OBS / Resolume / VDMX and pick SUPERNOVA's server. Syphon is macOS-only and hands the frame straight over the GPU — no capture card, no screen recording.
Does it change my sound?
No. The audio is a read-only, bit-exact pass-through — out equals in, sample for sample. SUPERNOVA only analyses the signal to drive the picture.
Specs
Formats: VST3 · AU · Standalone
Systems: macOS 11+ · Apple Metal
Build: Universal (Apple Silicon + Intel)
Engine: 262,144 GPU particles (512×512) · HDR linear + ACES
Worlds: 50 presets (physics + geometry + colour)
Color Lab: 17 OKLab look ramps
Audio: bit-exact pass-through (read-only tap)
App capture: system audio, driver-free — Core Audio taps (macOS 14.2+) · ScreenCaptureKit (13–14.1)
Output: window · fullscreen · Syphon → OBS / Resolume / VDMX
Export: MP4 / H.264 with sound · 1–600 s from a 30 s window (AVFoundation)
Modulation: 4 LFOs · 21 beat divisions (triplet + dotted) · free Hz · 12 targets
MIDI: MIDI-learn · CC · note triggers (explosion · directional ray)
License: free